I don’t know what it is, but I am having the hardest time getting our new house to look cozy and homey. I am also notorious for overthinking and putting extra research time in to something before I make a purchase. One thing I am hoping to add to are a few touches of wood into the decor. For some reason, natural wood gets a bad reputation in decorating. Or at least it used to. Now there are all kinds of chic ways to incorporate natural looking touches to your house, and not just by adding wooden furniture. Now you can find wood mixed in with metal, plastic, and even other types of wood. I thought this week I would round up some of my favorite items to add a touch of nature to your home.
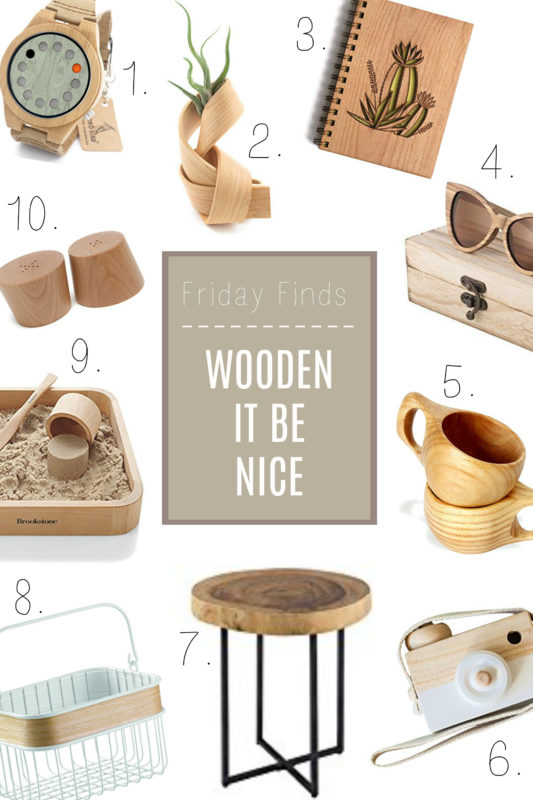
- Wooden Watch : $22
- Twisted Vase : $88
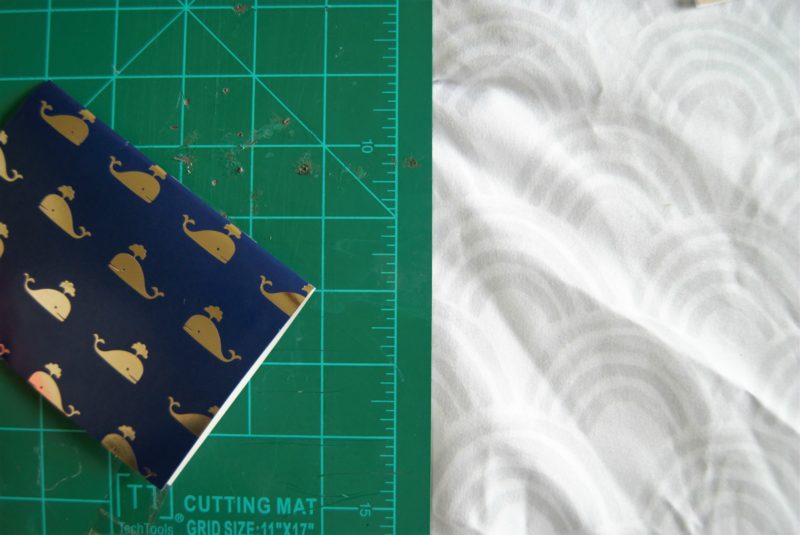
- Cactus Journal : $29
- Cat Eye Sunglasses : $30
- Wooden Mug : $13
- Toy Camera : $9
- Wooden Table : $104
- Wire Basket : $19
- Tabletop Sandbox : $17
- Wooden Salt and Pepper Shakers : $30


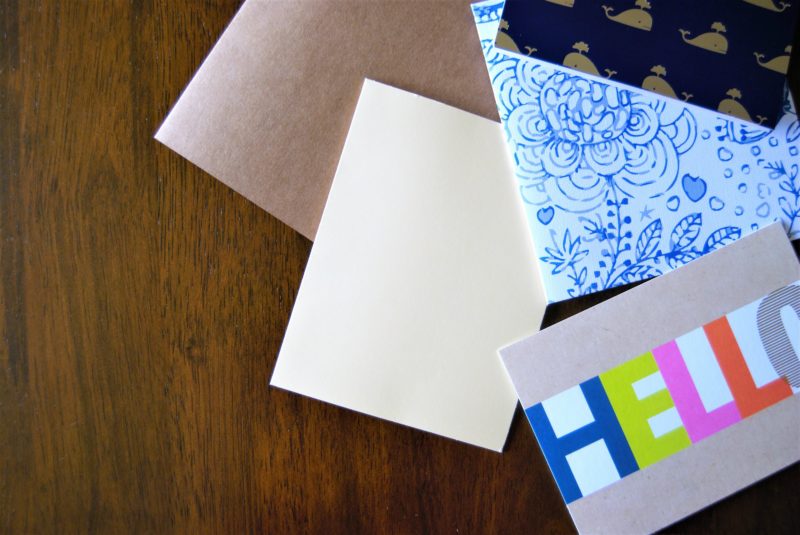
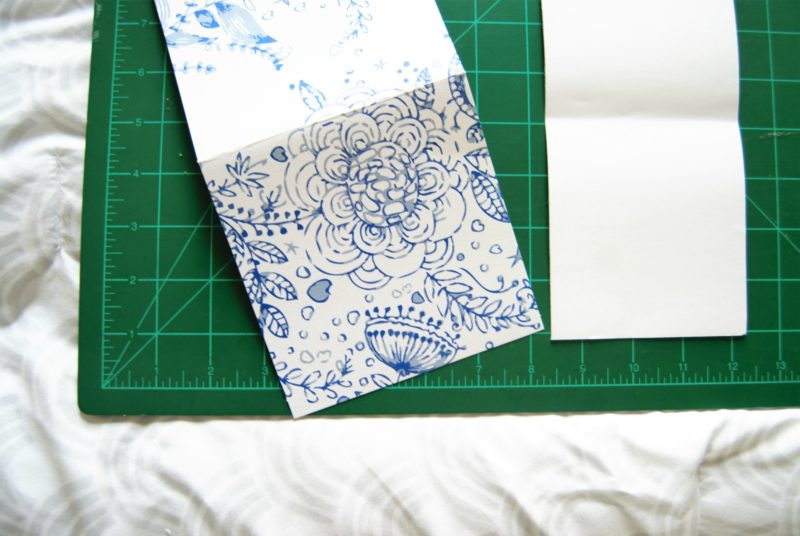
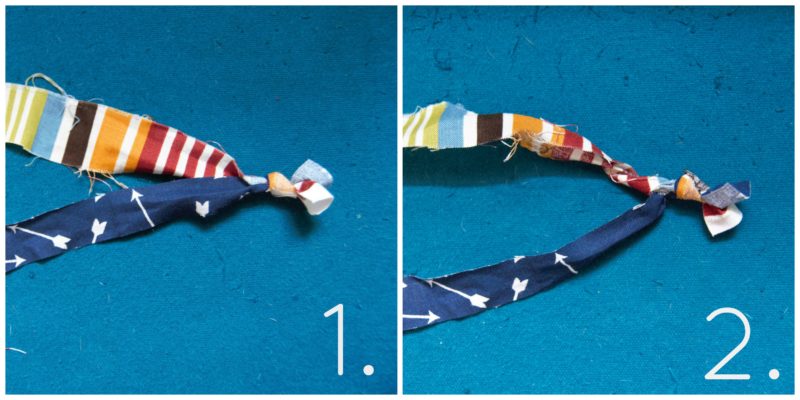
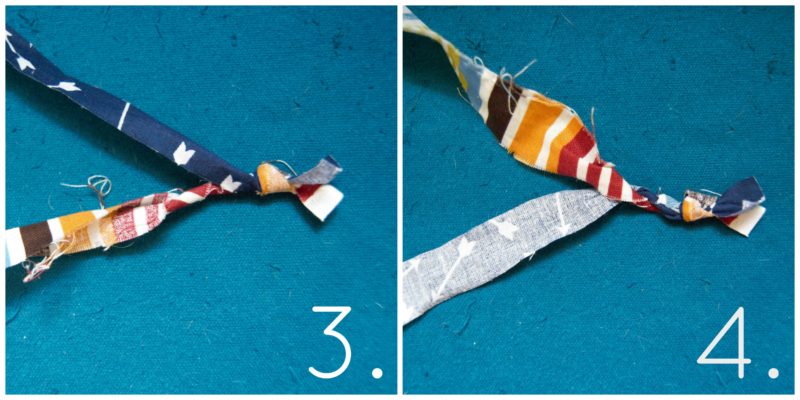
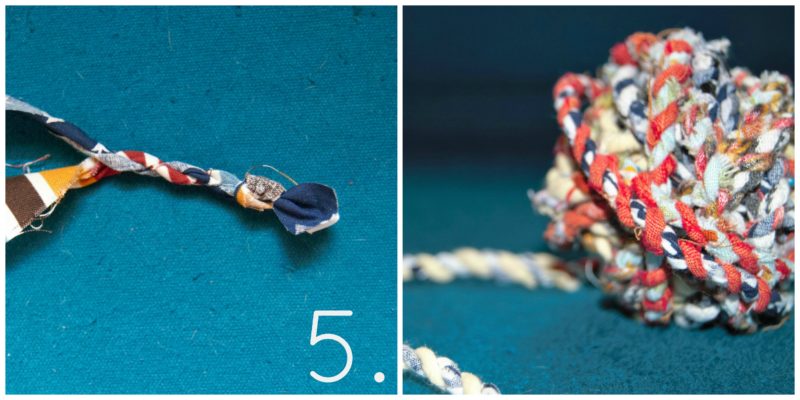
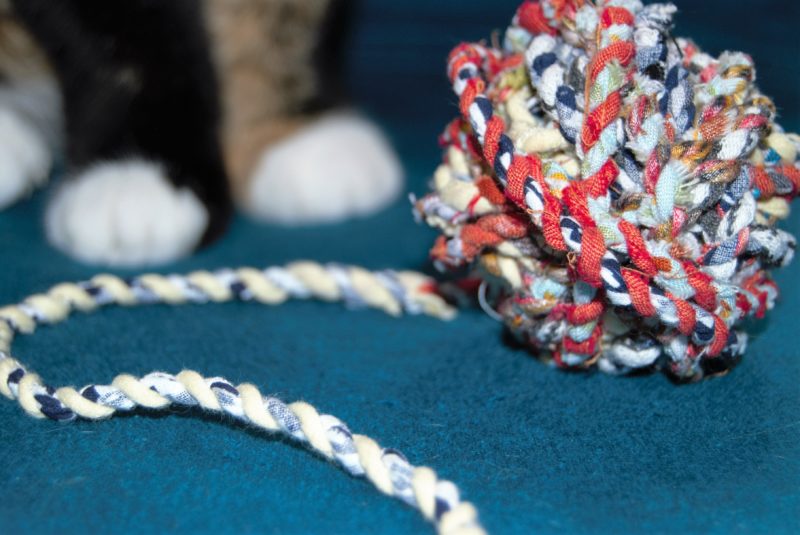
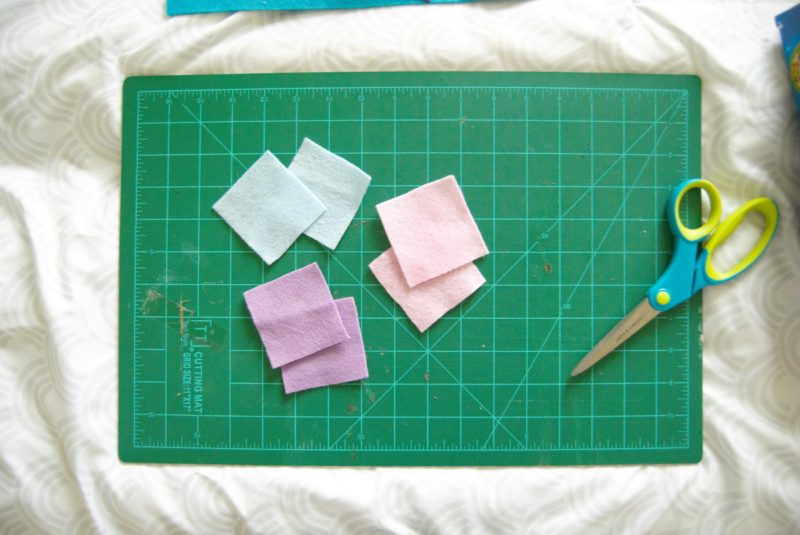
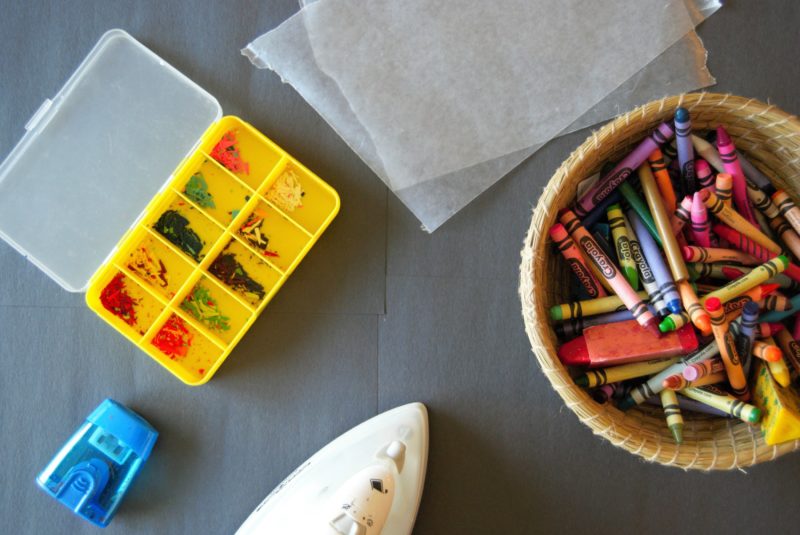 What you will need:
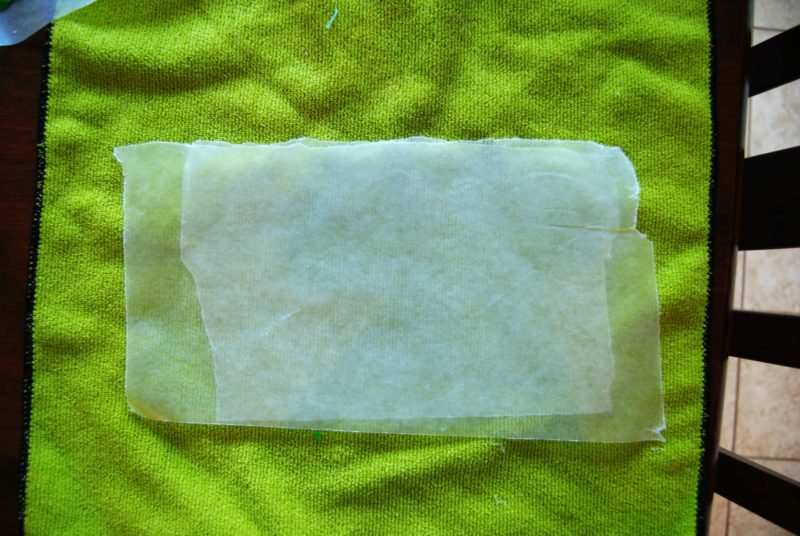
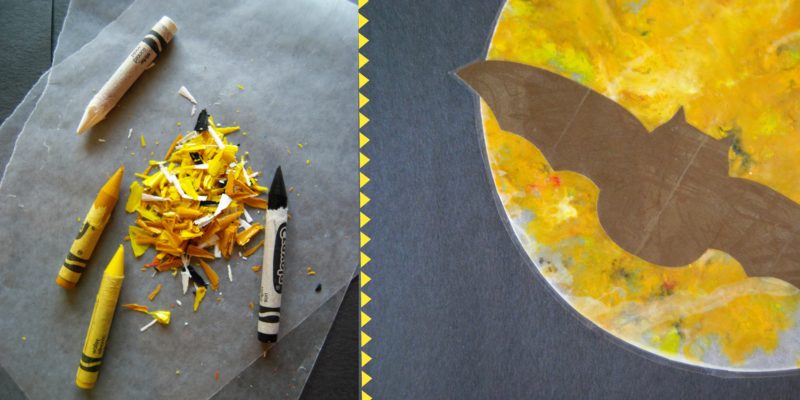
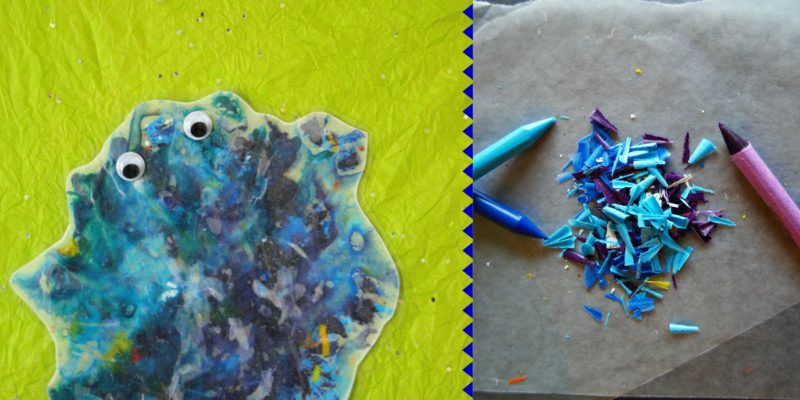
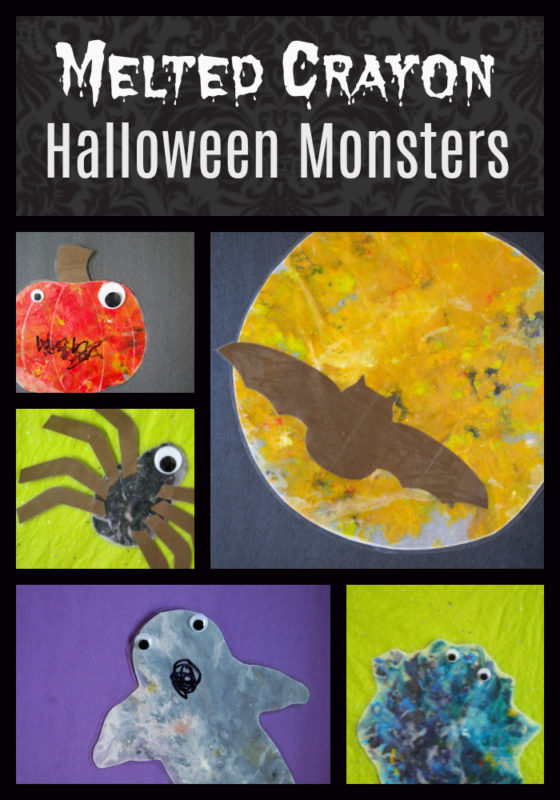
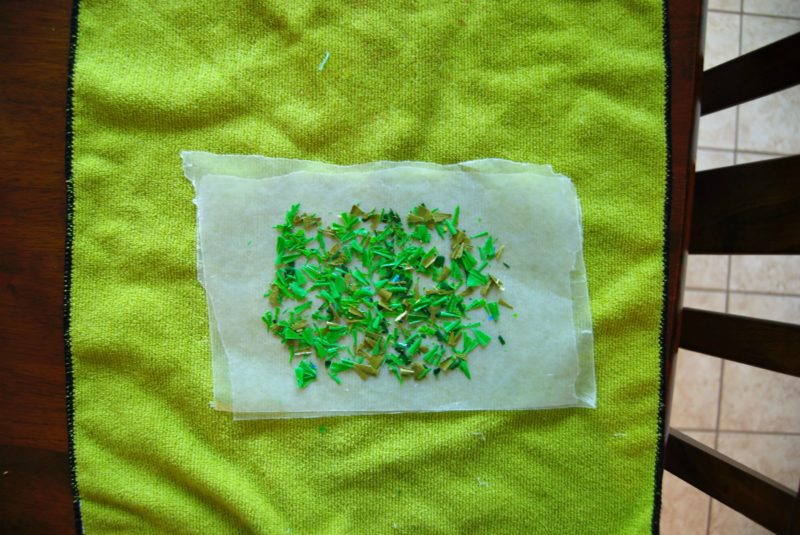 Once the sheets are on top of the towel, sprinkle the colors your want on to the paper. A little wax will go a long way, you don’t have to have the entire area completely covered with shavings.
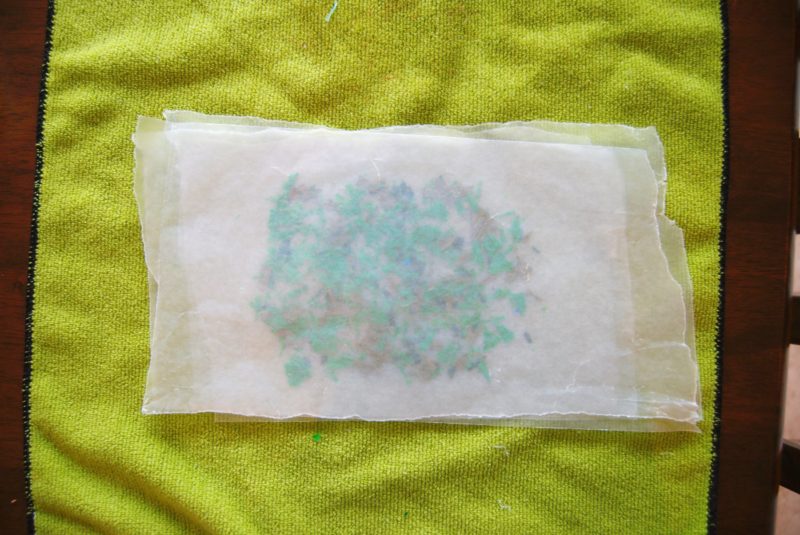 Once you have your desired and approximate color layout, take two more sheets of wax paper and place them on top of the pile of savings. The two sheets on both sides help keep the wax from seeping through the paper.
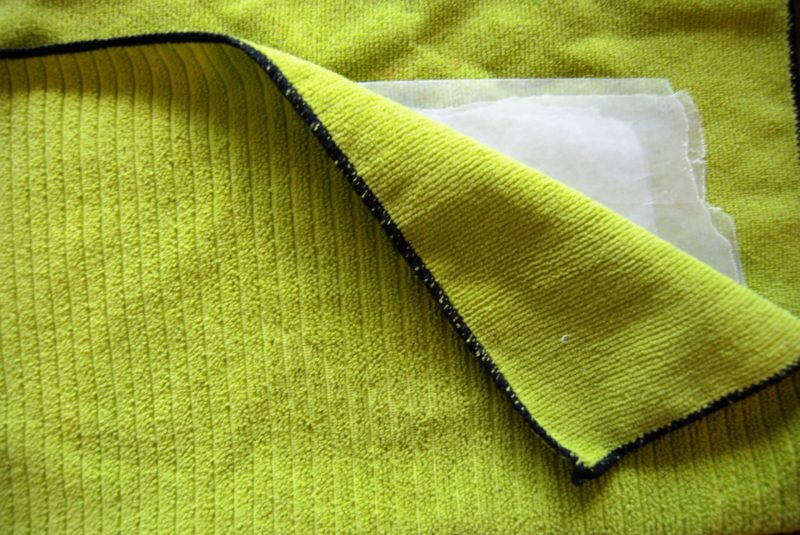 Cover the stack of wax paper with another dish towel and place your iron on top. Moved the iron around slowly but in small circular motion. In some cases you might need to press down a little when you move the iron to make sure that the color spreads to all of the less covered places.
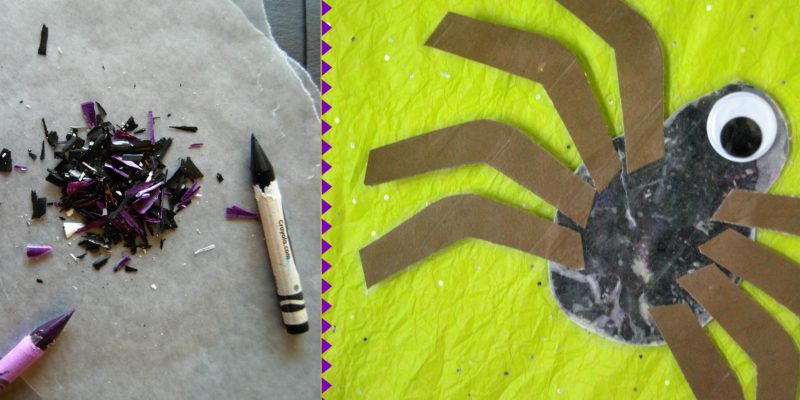
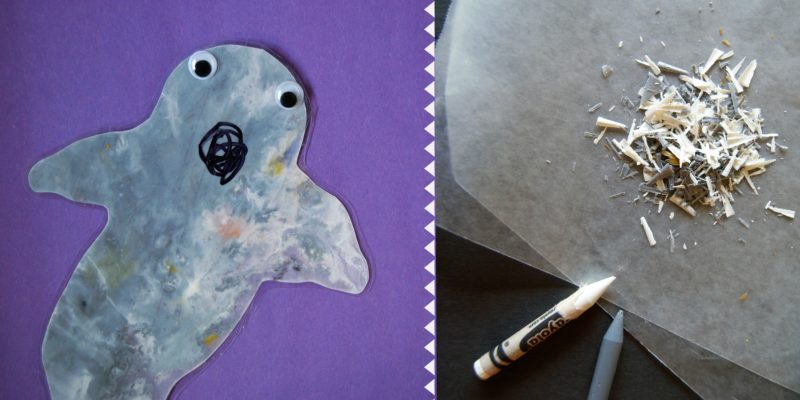
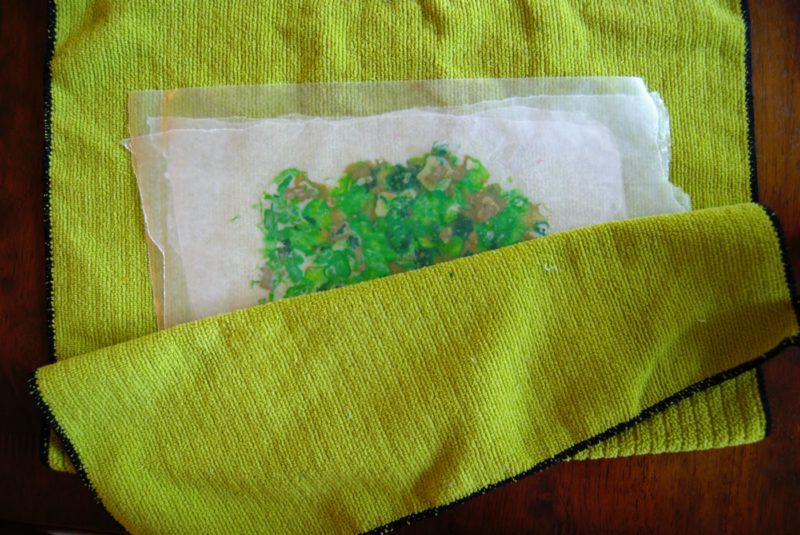 Check under the towel every once in a while to see how the melting is going and to see where you still need to move the iron. Once your crayon shavings are melted remove the iron and set aside the wax to cool off.
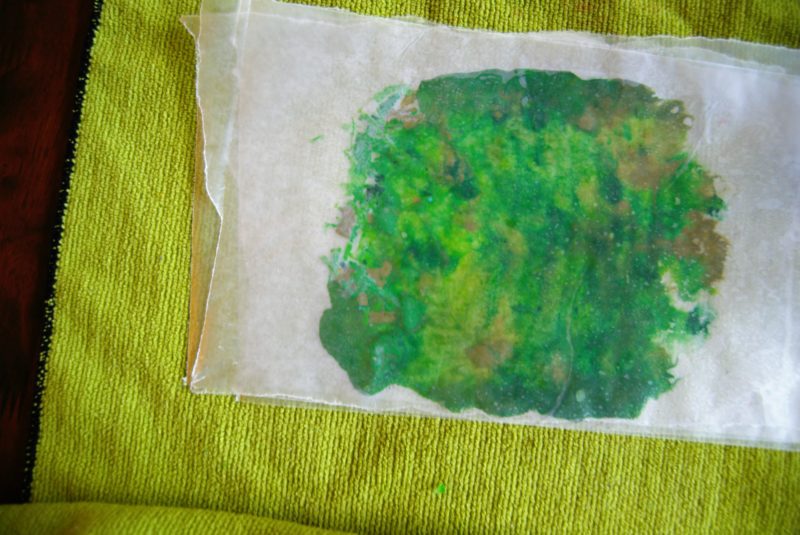 Cooling off should only take a few minutes. At this point you may want to remove the extra layer of wax paper on either side keeping one layer on each side of the melted wax. It isn’t necessary but sometimes the colors seem more vibrant through one layer of wax paper instead of two.
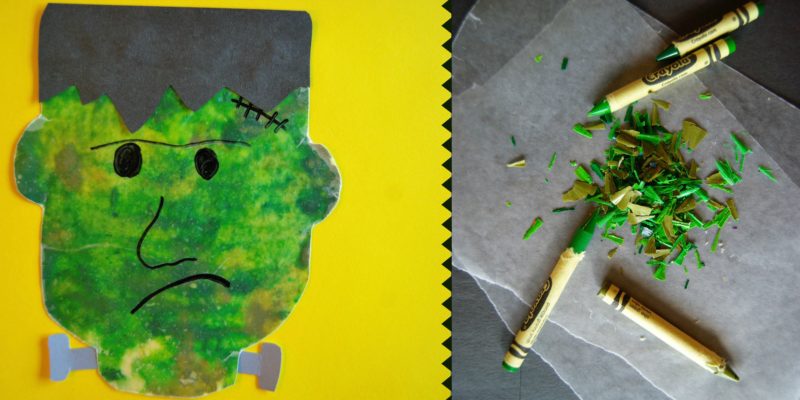

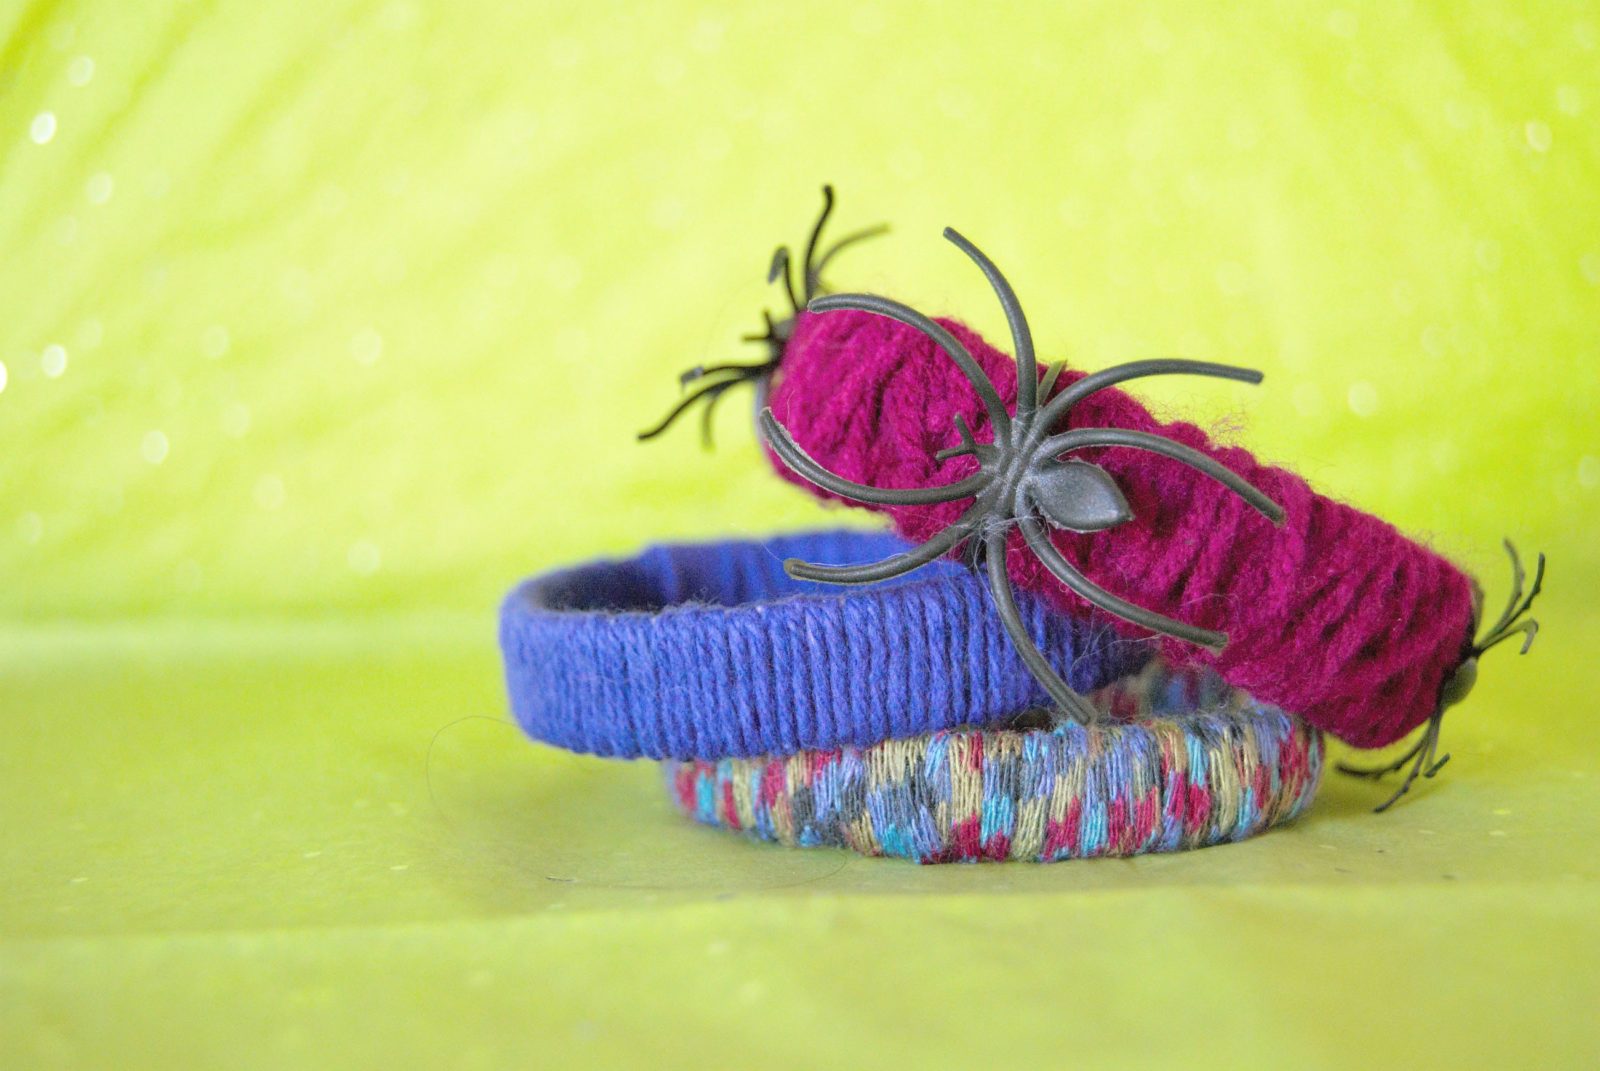
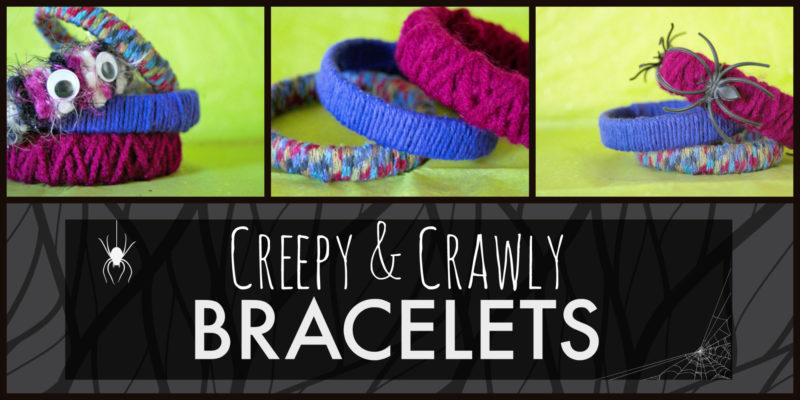 Halloween is just around the corner and while most people have been planning their costume for weeks, I have put very little thought into it. I get way more excited planning what my toddler is going to be. I’m usually stuck somewhere between wanting to show my Halloween spirit but wanting to wear clothes that won’t leave me freezing, itchy or with some form of face paint on. I’m also one of those people that once I get dressed in the morning, I’m dressed for the day. That’s where these cute Halloween bracelets come in.
 What You Will Need:
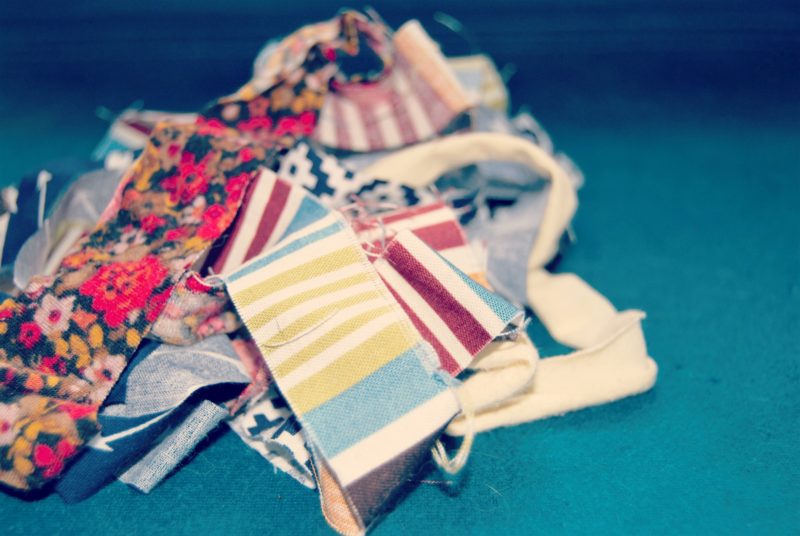
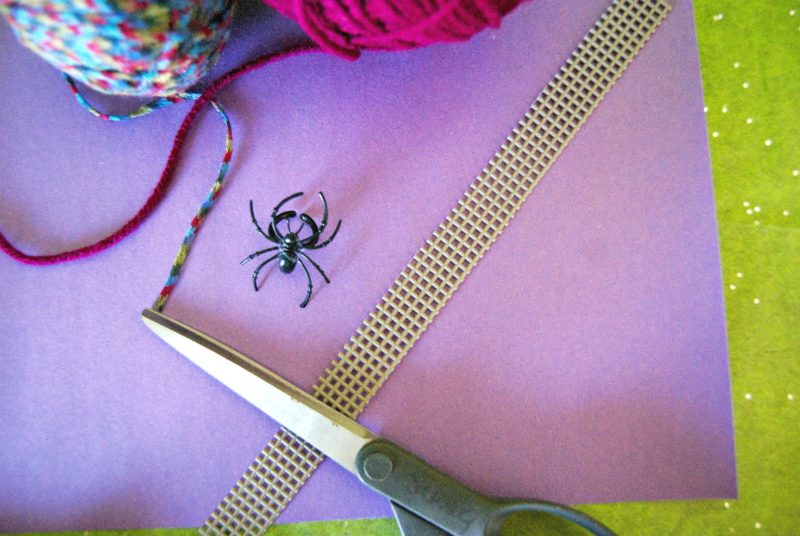 First you will need to cut a strip of plastic canvas in the width that you want for your bracelet. I cut the strip along the shorter side of the plastic canvas sheet so that I could make more. It doesn’t matter at this point if it is too long because you will want to overlap it anyway.
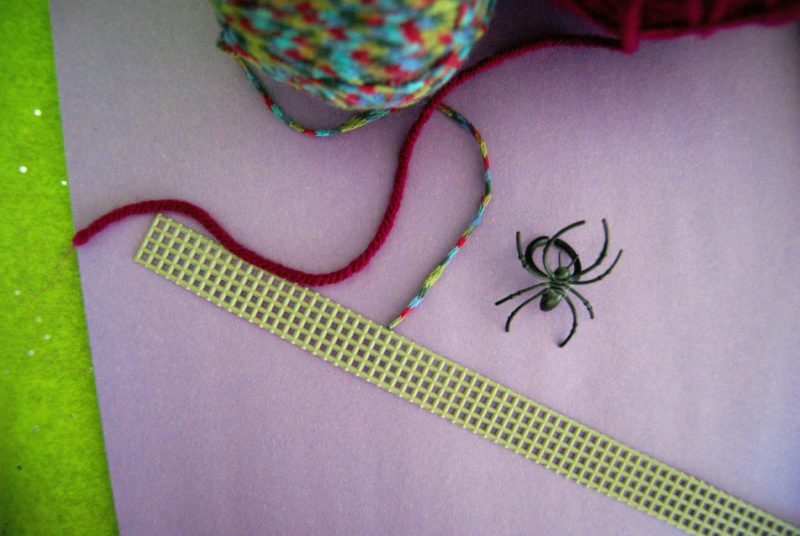 Next make sure you cut off any of the little “nubbins” from the plastic canvas. You want it to be smooth on both sides of the strip. This is an easy step, but a surprisingly messy one. Those things will go everywhere and if they get in your carpet the only chance of getting them out is vacuuming.
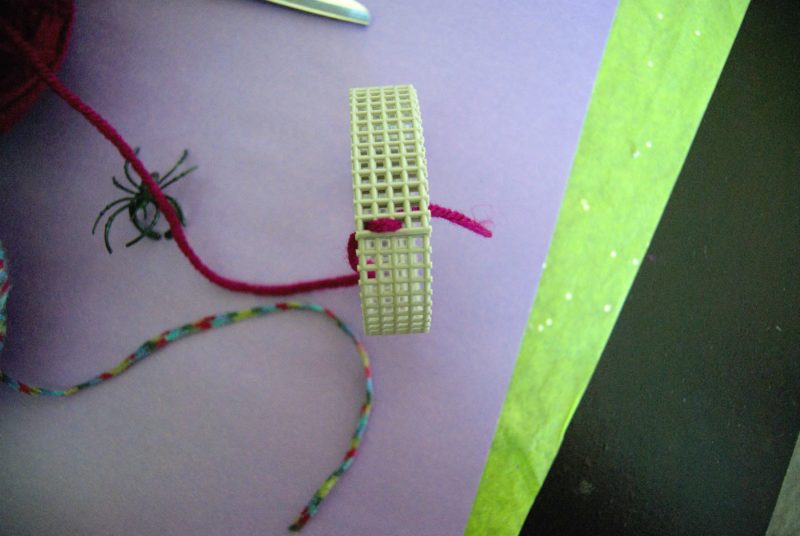 Now you need to determine the size of your bracelet. It needs to easily go on to your wrist but also not be so big that it falls right off. This is where the overlapping happens. Once you get the size you want, you will need to tie the overlapping parts together. You will only need to do this in one little spot, just to make sure the size stays like you want it.
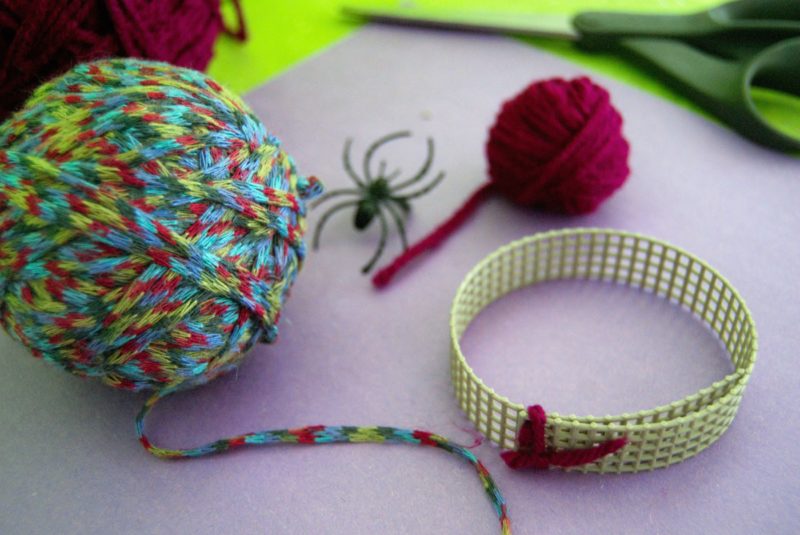
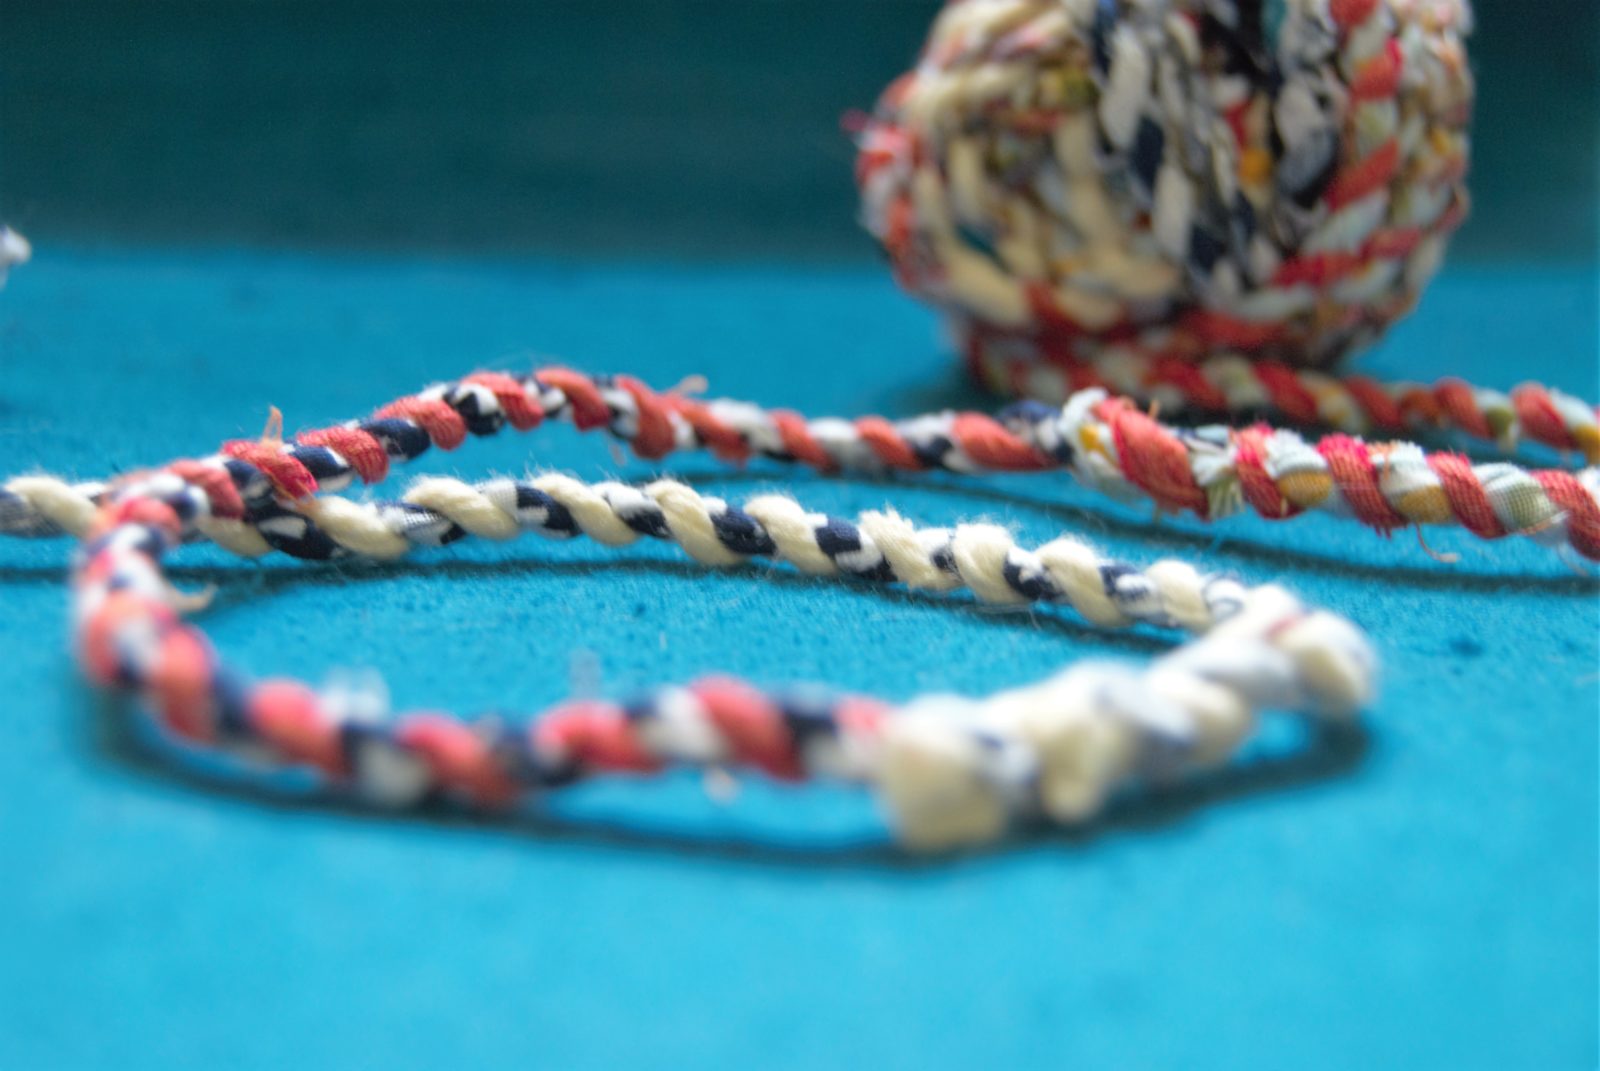
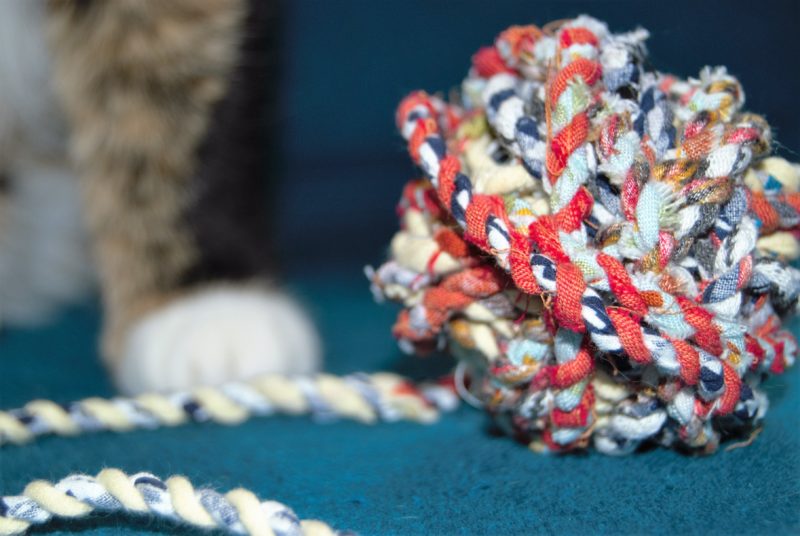
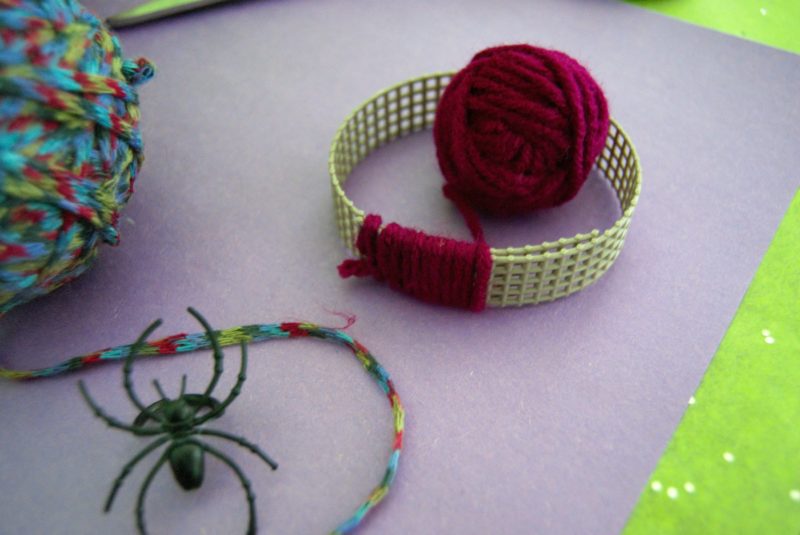 Once you have your mini yarn ball, pick a spot and start wrapping it around the strip. This part is the most annoying and time consuming part. Weaving through the bracelet hole while trying to keep the yarn close together on the strip takes a little bit of effort. Once you make it all the way around the bracelet you can either stop or go around again just to give it a little something extra. I went around three times, but on the third time I wrapped it not as tight and spread it out to give it a little different texture.
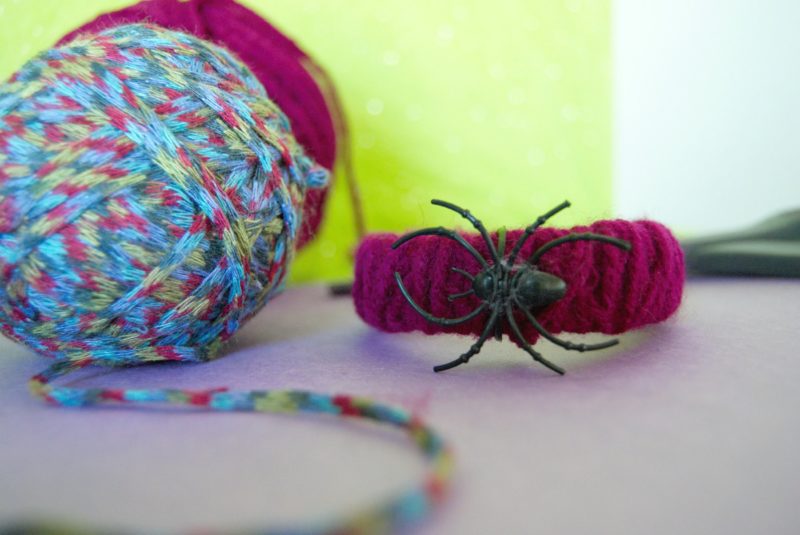 Once you have your bracelet wrapped you will need to cut the yarn and glue the end down, preferably on the inside of the bracelet. I glued it down and then tucked it a little so that it would be more hidden.
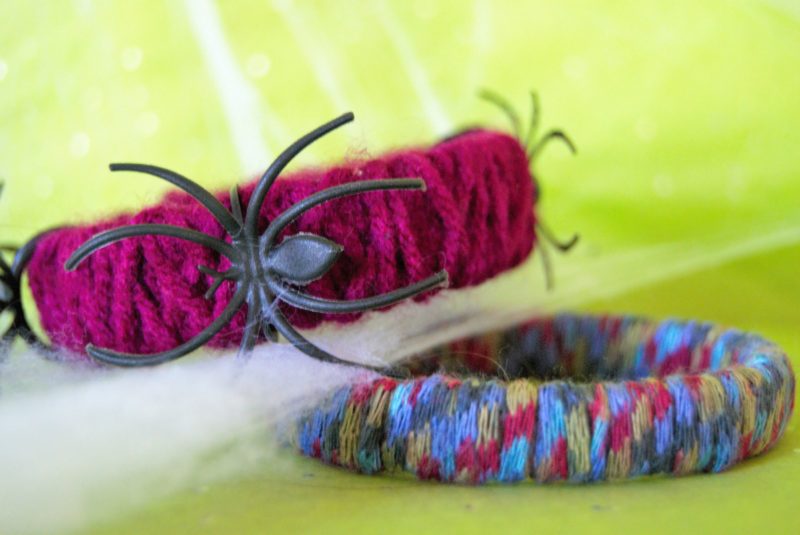
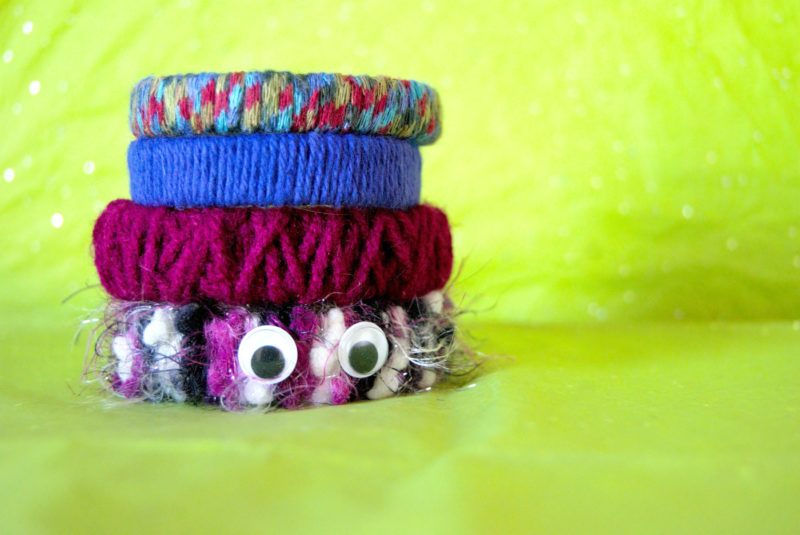
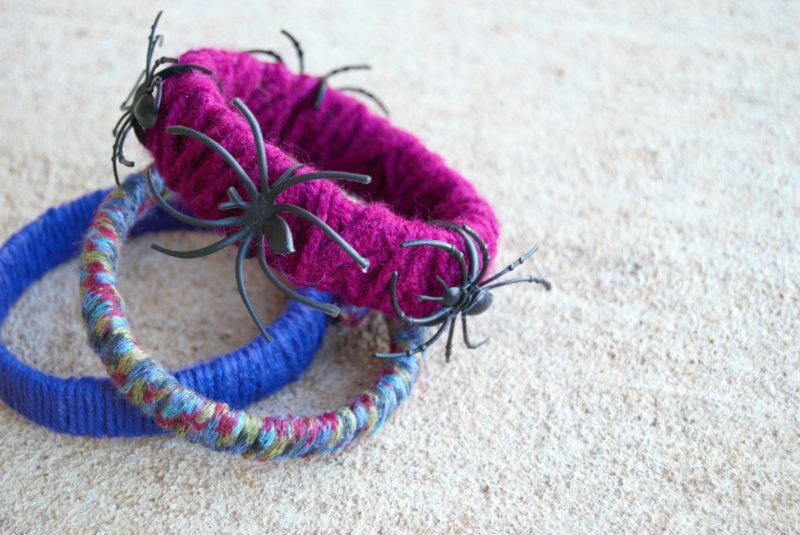 Finally add all of the finishing touches! I just simply took the spider rings and cut the ring part to there was an opening and wrapped it around the bracelet. If you bracelet is smaller in width, you can cut the spiders from the ring and glue them to it. For eyes I just glued them on. I think in hindsight I would have used a different color of yarn so that the spiders would stick out more. I didn’t want to do the traditional orange and black because I’m honestly not a big a fan of the color. But a green or even a lighter purple would have looked pretty good too. You could easily add some small plastic snakes or skeleton bones if you could find them. I even tried wrapping one in “spider webs” but it looked a mess so I didn’t post any pictures. When you are done, slip your creation on and wear it proudly!
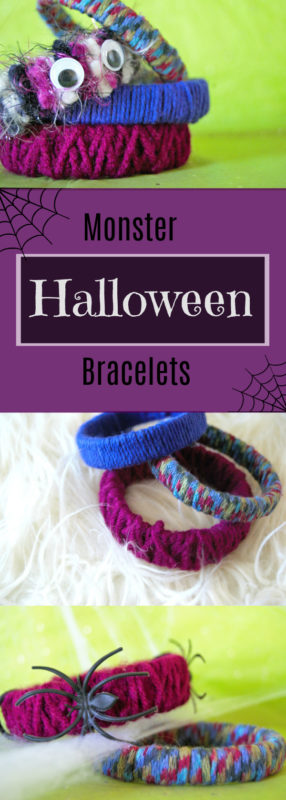
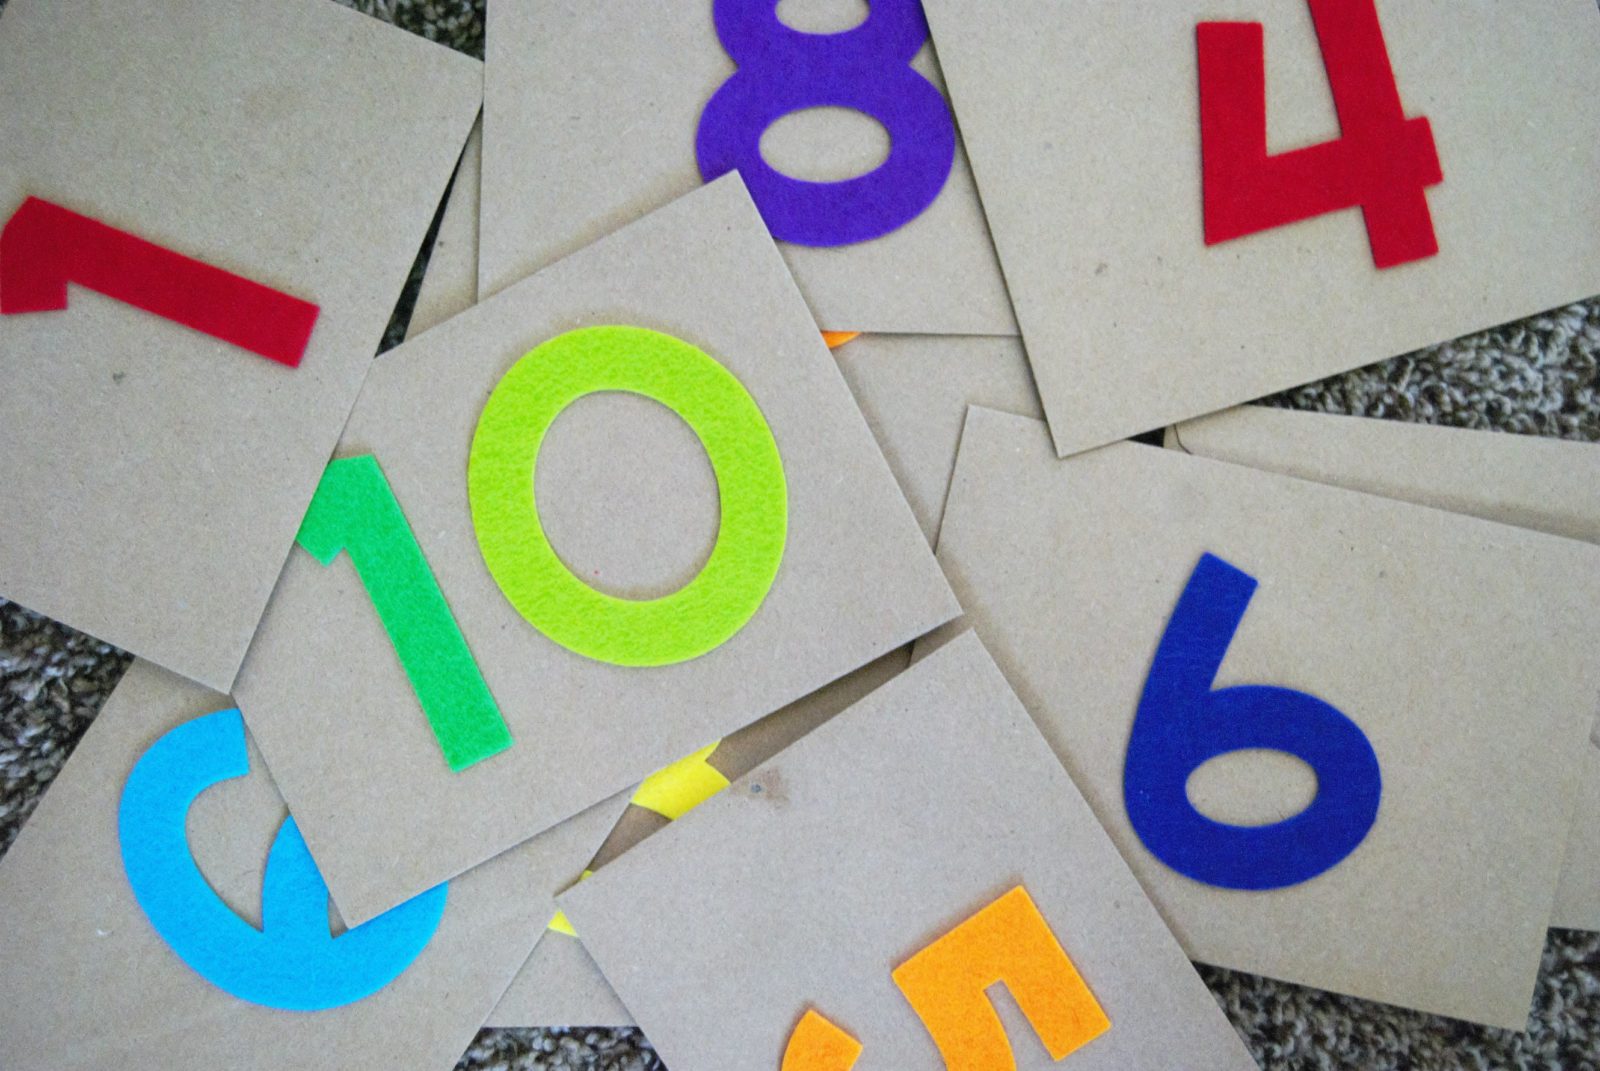

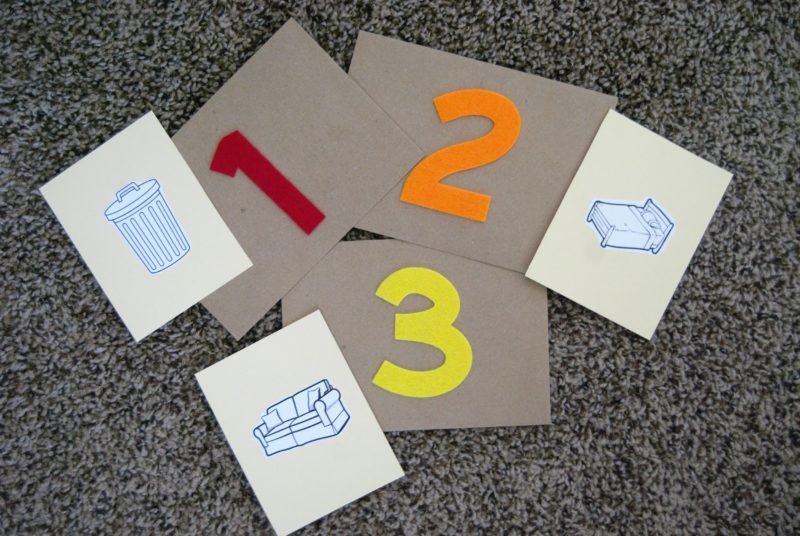
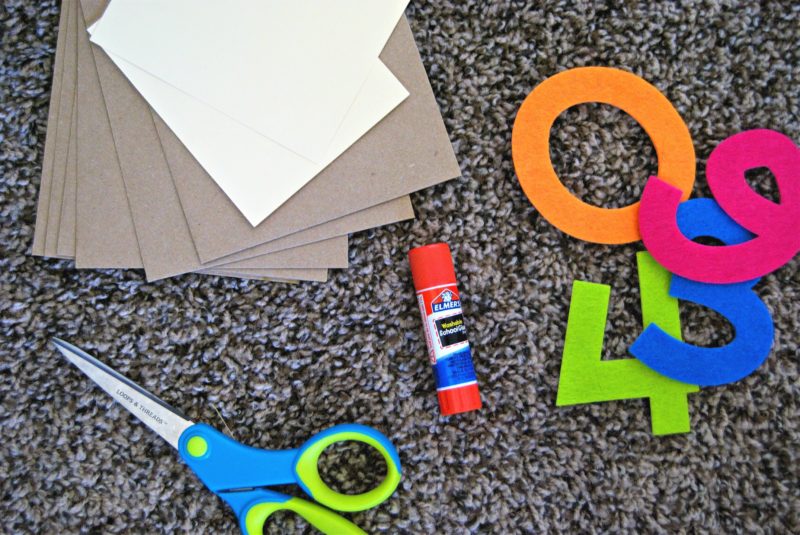 First thing I did was think of things around that house that were easily recognizable for little FEZ. I tried find clip art for each item and I wanted them to be as simple as the Googling powers of the internet would allow me to find.
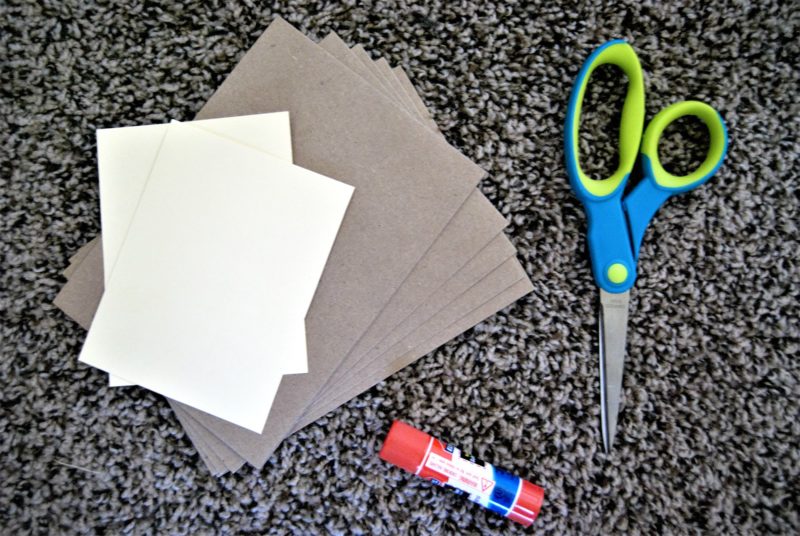
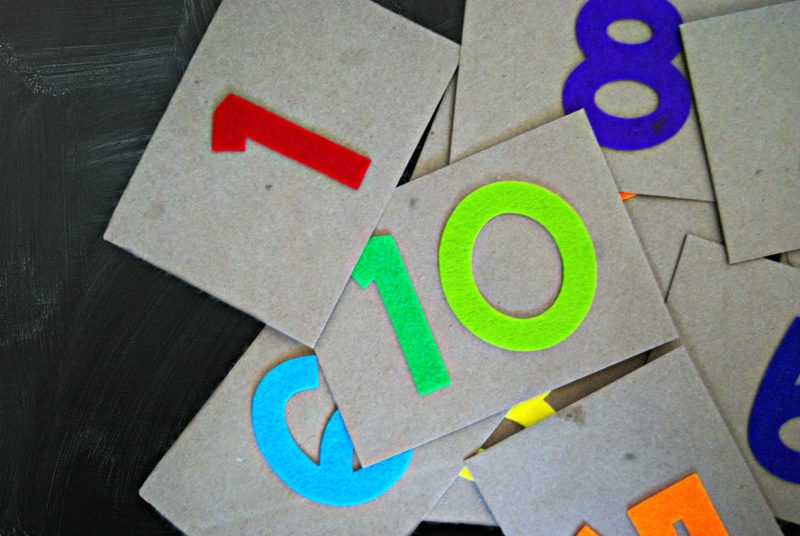
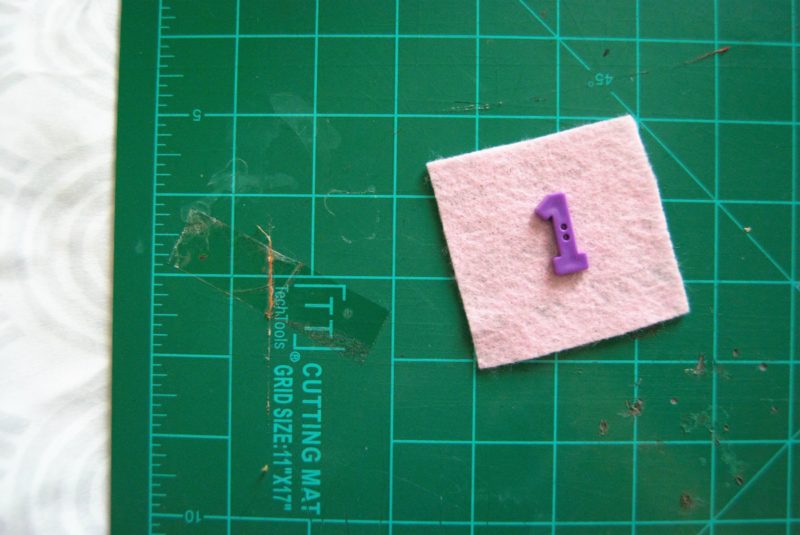
 Next up, I simply peeled the backing off of the felt numbers and stuck them to the outside of the envelopes. I only numbered them 1-10 but you could easily do more. Obviously felt numbers aren’t a requirement for this project, you could easily write the numbers on the envelopes. I just happened to have some stick on numbers gathering dust in the craft room and was thrilled that I finally found a use for them!
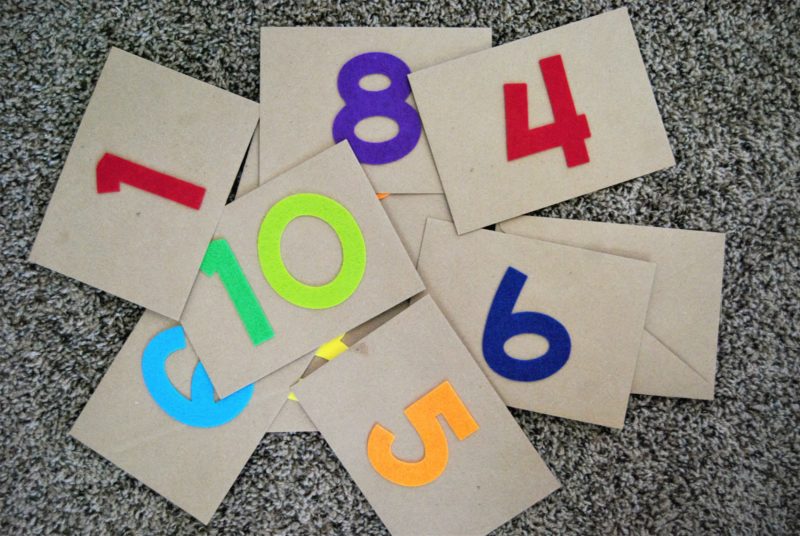
 To play the game you just need to leave the clues in the envelopes. In the first envelope you will put the picture card with the location of the second envelope. For example, envelope 1 had the picture of the fridge in it. Envelope number 2 was taped to the side of the fridge. Inside envelope 2 was a picture of an easel. Taped to the easel was envelope number 3. You get the idea. To start the game you simply give your little one the first envelope. I helped FEZ out the first few envelopes but once he got the hang of it he was all over the house hunting clues. The last clue led the little guy to a little “treasure chest” that had a pack of fruit snacks and a cookie.


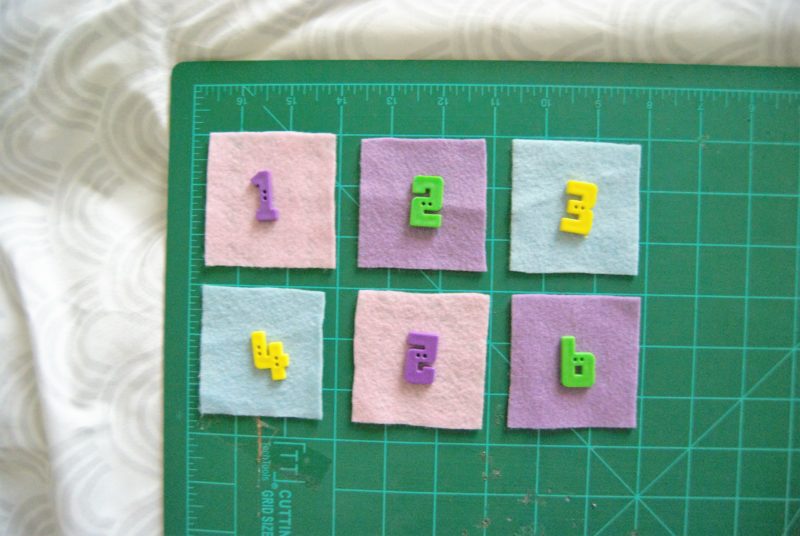
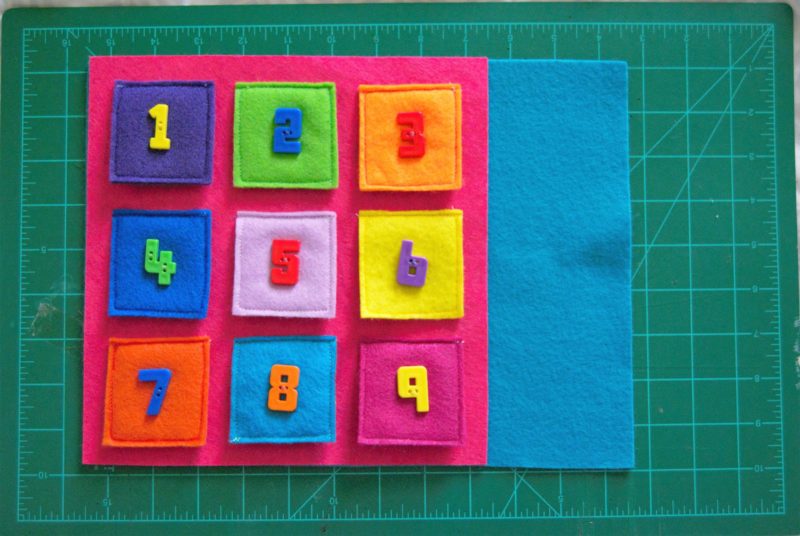
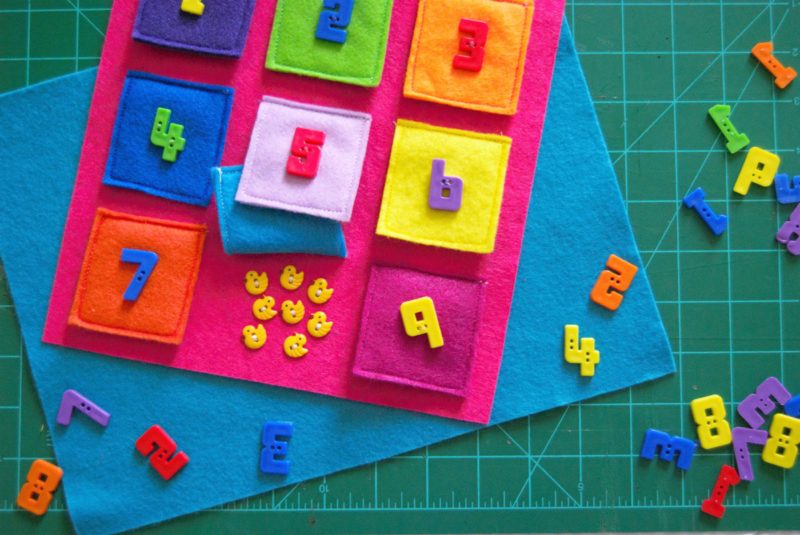
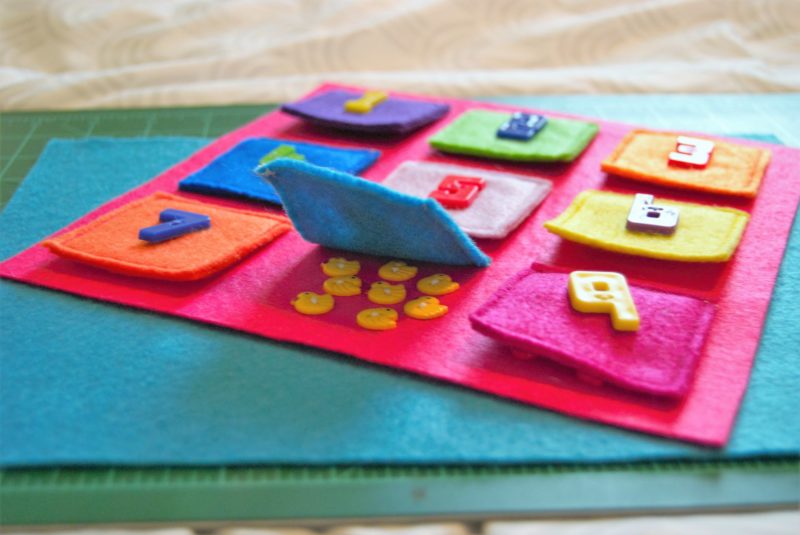
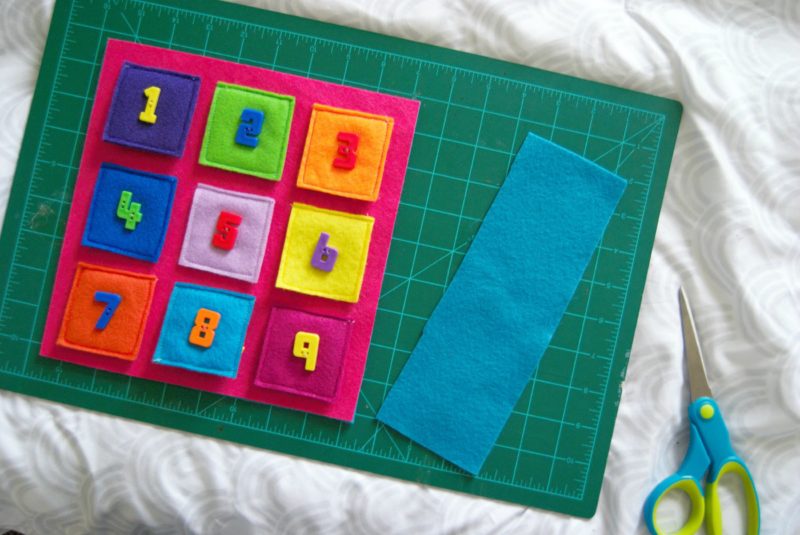 Once the page is complete you can lay the whole thing on top of a regular felt page and sew the two together so that your tied off ends and the stitches from the back of the page are hidden and the page is more sturdy. Then cut off the excess felt. I usually add three eyelets to one side of the page when I am finished and I keep them all held together in a “book” with binder rings.